Intro
Background
This blog post is part of a series where an entire ETL pipeline is built using Airflow 2.0’s newest syntax and Raspberry Pis. It entails knowledge of some terms, so here’s a great place to refresh memory. Also, check my previous post on how to install Airflow 2 on a Raspberry Pi.
The full code is on Github.
Create a DAG definition file
We’ll start by creating a DAG definition file inside the airflow/dags folder:
touch example.py
Let’s populate it by adding a DAG.
DAG breakdown
The @dag decorator
A DAG has tasks. In this example, it has two tasks where one is dependent on the result of the other. For this, we’ll be using the newest airflow decorators: @dag and @task.
We start by defining the DAG and its parameters. We’ll determine the interval in which the set of tasks should run (schedule_interval) and the start date (start_date). Of course, there are other parameters to chose from, but we’ll keep the scope to the minimum here.
# Use the DAG decorator from Airflow
## `schedule_interval='@daily` means the DAG will run every day at midnight.
## It's possible to set the schedule_interval to None (without quotes).
@dag(schedule_interval='@daily', start_date=days_ago(2))
# The function name will be the ID of the DAG.
# In this case, it's called `EXAMPLE_simple`.
def EXAMPLE_simple():


# Placeholder for the tasks inside the DAG
# ...

# run the dag
dag = EXAMPLE_simple()
Notice the @dag decorator on top of the function EXAMPLE_simple. The function name will also be the DAG id. In the end, we just run the function of the DAG.
The @task decorator
Now that the @dag wrapper is settled, we need to define the two tasks inside. Remember, this DAG has two tasks: task_1 generates a random number and task_2 receives the result of the first task and prints it, like the following:
# ...
    @task
    def task_1():
        return random()

    @task
    def task_2(value):
        print(f'The randomly generated number is {value} .')

    # This will determine the direction of the tasks.
    # As you can see, task_2 runs after task_1 is done.
    # Task_2 then uses the result from task_1.
    return task_2(task_1())
# ...
Visually, the DAG graph view will look like this:
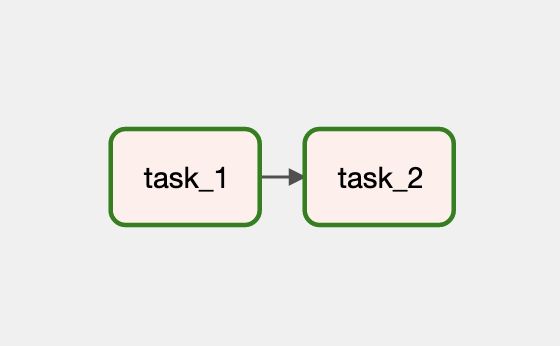
The code before and after refers to the @dag operator and the dependencies. Next, we’ll put everything together:
from airflow.decorators import dag, task
from airflow.utils.dates import days_ago

from random import random

# Use the DAG decorator from Airflow
# `schedule_interval='@daily` means the DAG will run everyday at midnight.
# It's possible to set the schedule_interval to None (without quotes).
@dag(schedule_interval=None, start_date=days_ago(2), catchup=False)
# The function name will be the ID of the DAG.
# In this case it's called `EXAMPLE_simple`.
def EXAMPLE_simple():

    @task
    def task_1():
        # Generate a random number
        return random()

    @task
    def task_2(value):
        # Print the random number to the logs
        print(f'The randomly generated number is {value} .')

    # This will determine the direction of the tasks.
    # As you can see, task_2 runs after task_1 is done.
    # Task_2 then uses the result from task_1.
    return task_2(task_1())


dag = EXAMPLE_simple()
That’s it. Let’s run this.
Running the DAG
Once the DAG definition file is created, and inside the airflow/dags folder, it should appear in the list. Now we need to unpause the DAG and trigger it if we want to run it right away. There are two options to unpause and trigger the DAG: we can use Airflow webserver’s UI or the terminal. Let’s handle both.
Run via UI
First, you should see the DAG on the list:

In this example, I’ve run the DAG before (hence some columns already have values), but you should have a clean slate.
Now we enable the DAG (1) and trigger it (2), so it can run right away:

Click the DAG ID (in this case, called EXAMPLE_simple), and you’ll see the Tree View. Having triggered a new run, you’ll see that the DAG is running:

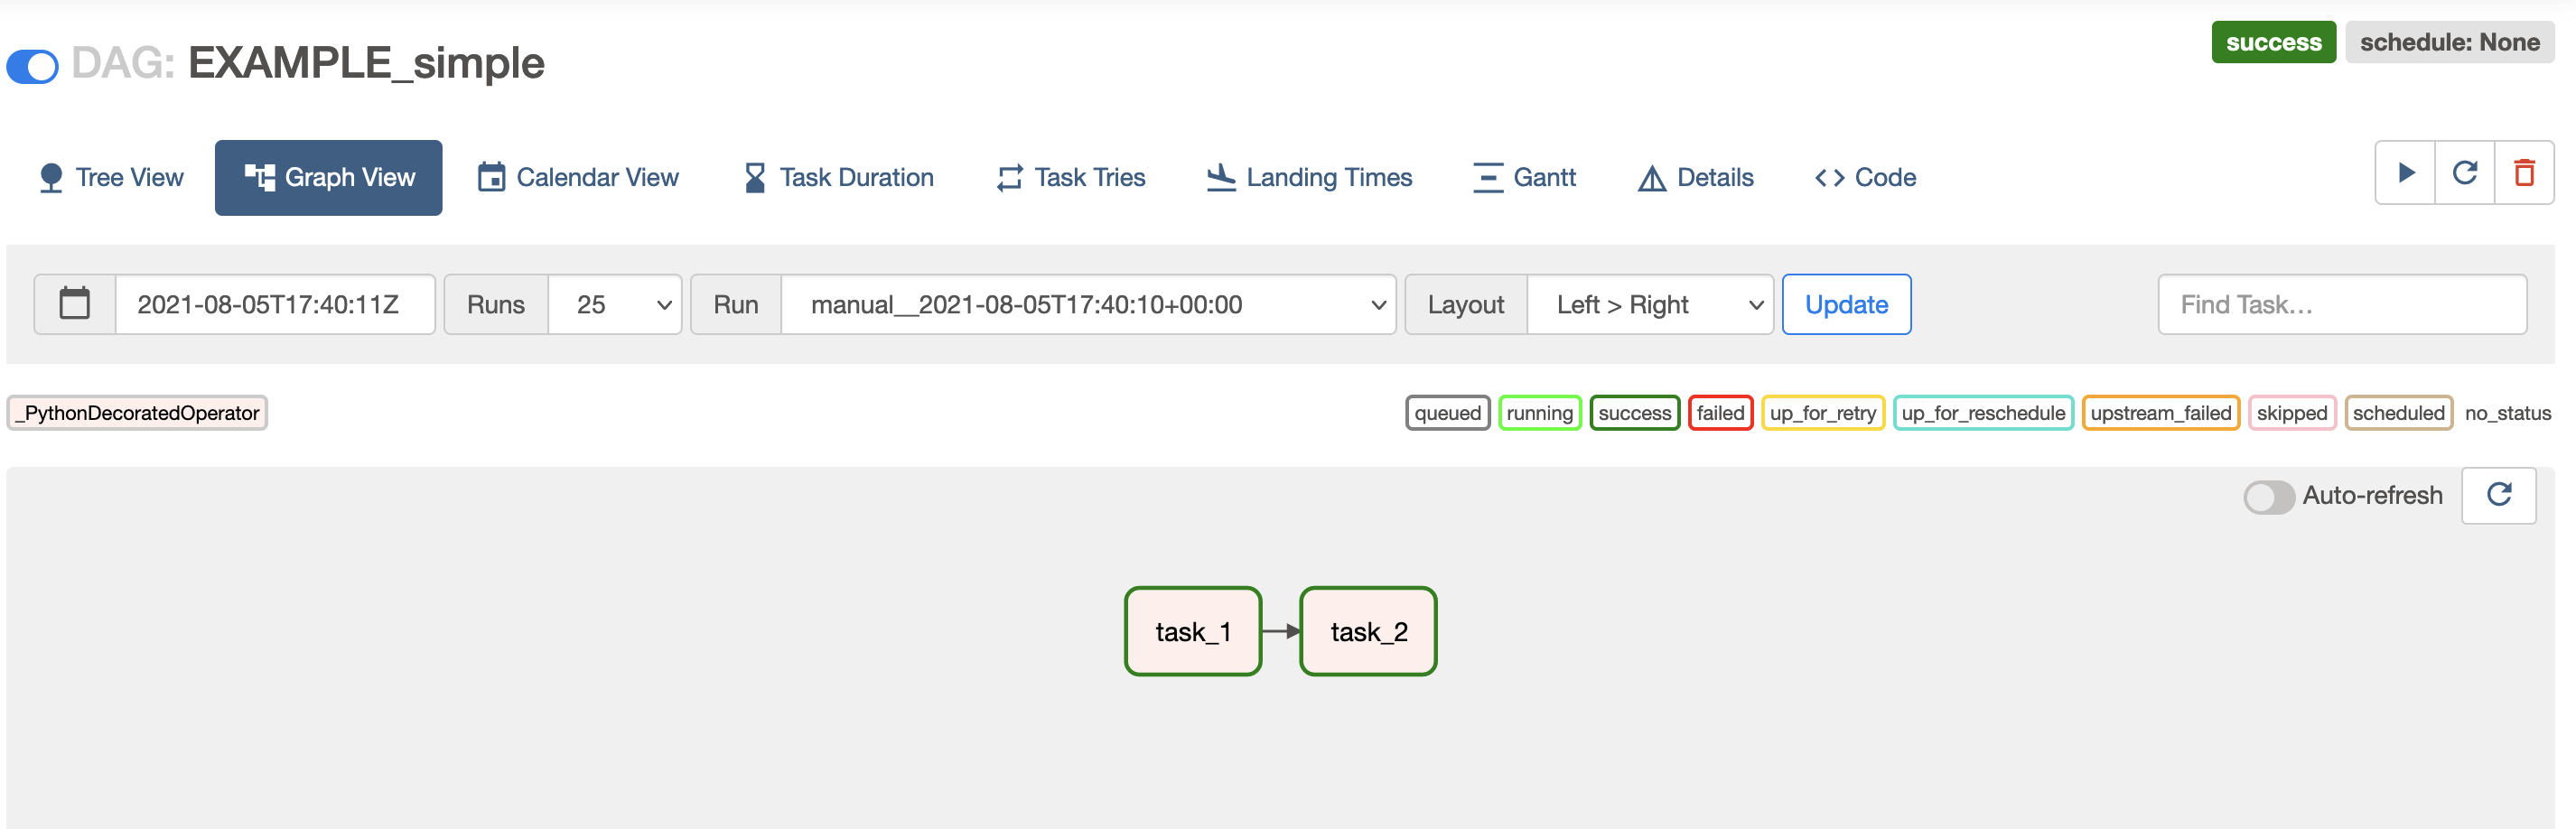
Heading over to the Graph View, we can see that both tasks ran successfully 🎉:

But what about the printed output of task_2, which shows a randomly generated number? We can check that in the logs.
Checking the logs via UI
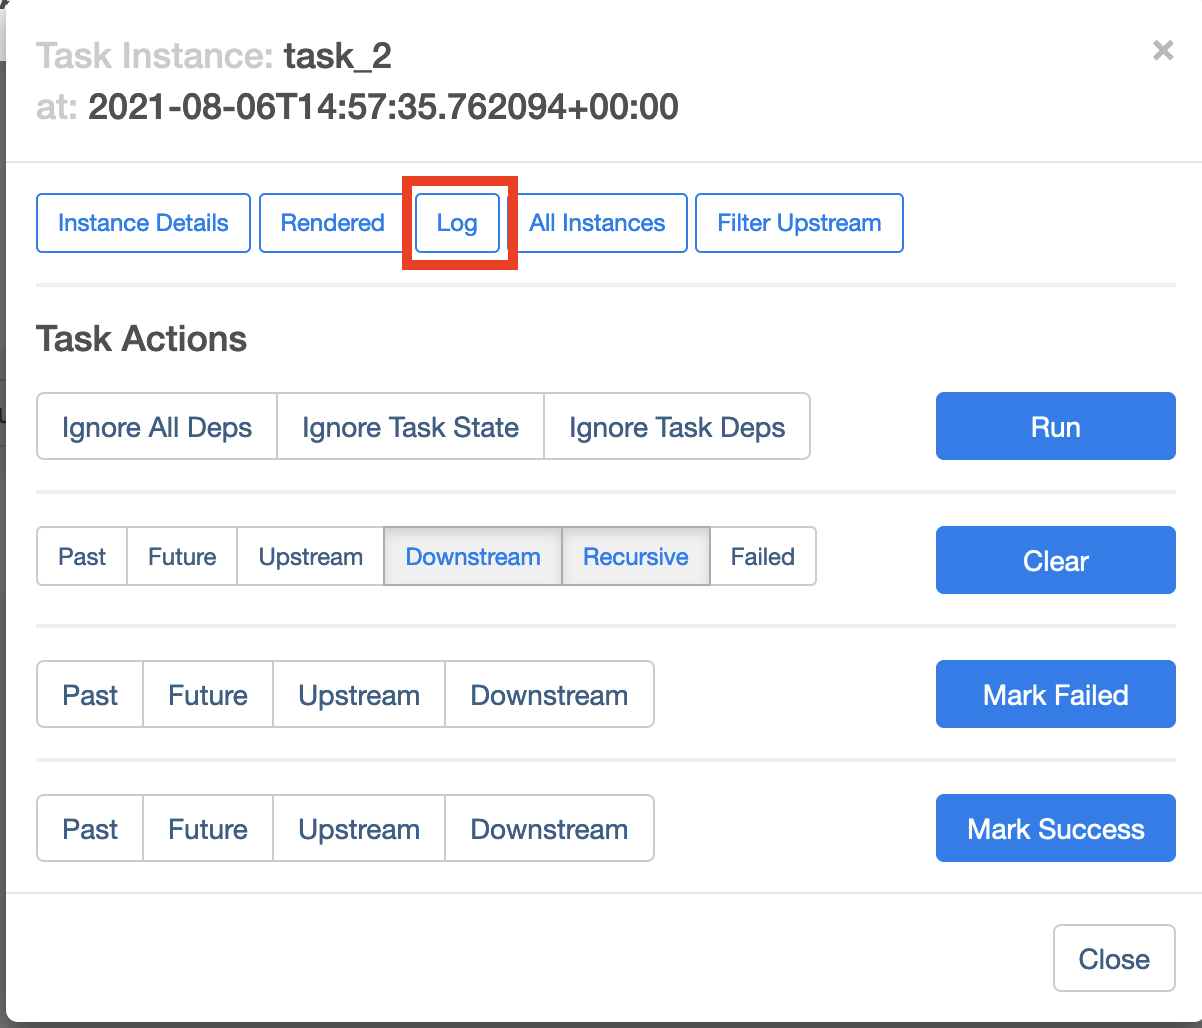
Inside Graph View, click on task_2, and click Log.
It’s possible to see the output of the task:
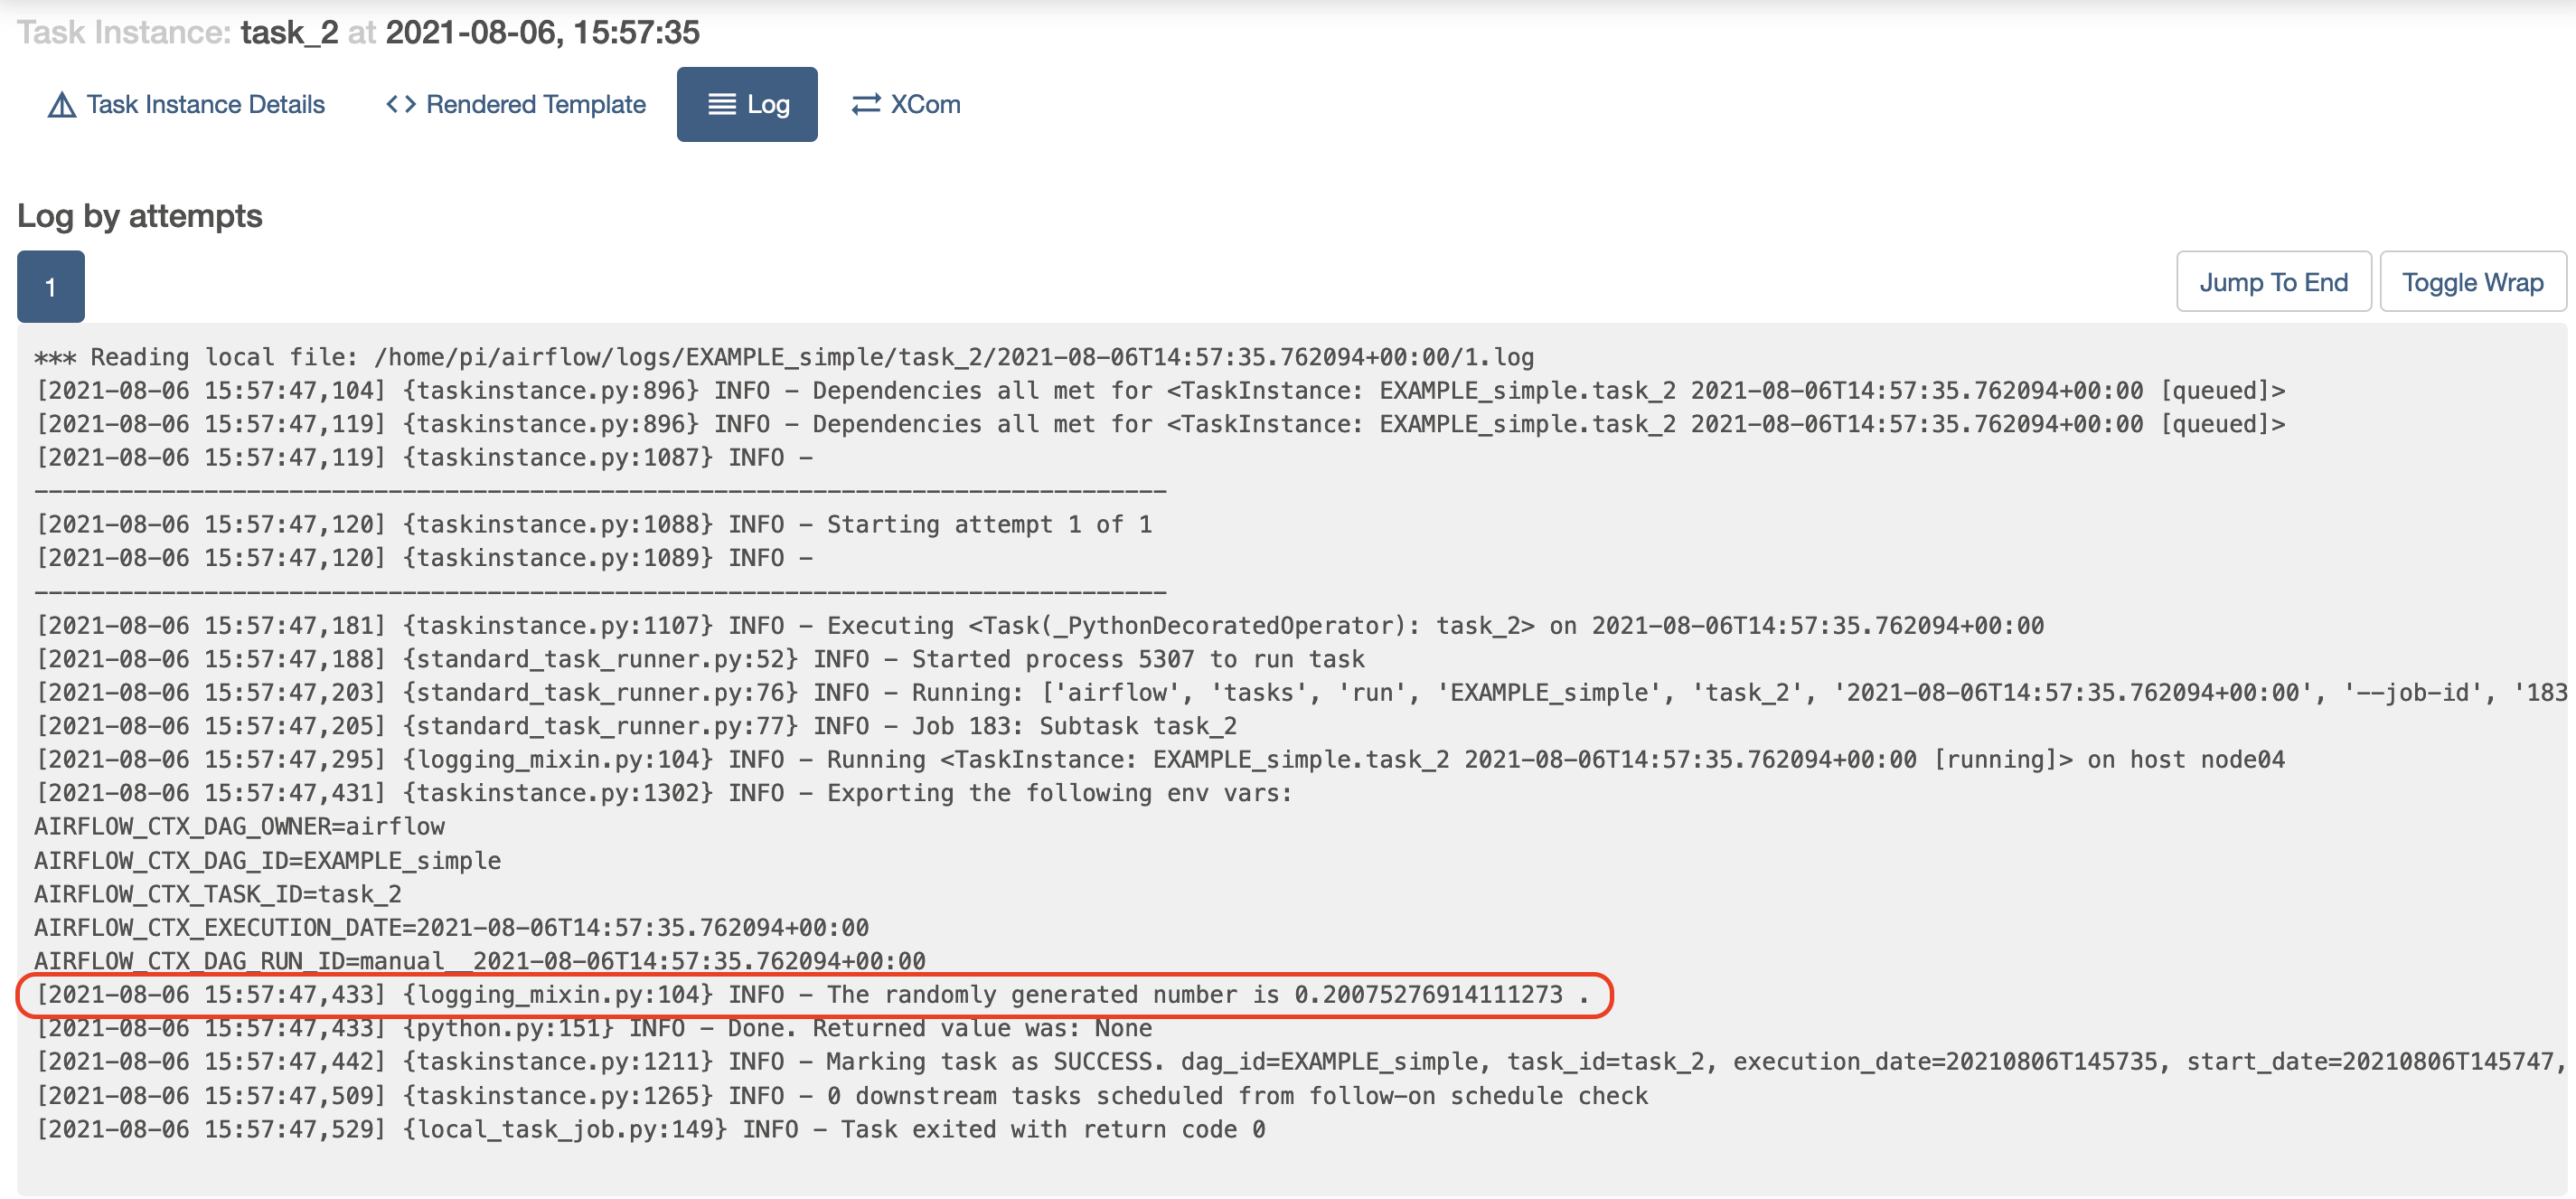
Success again 🎉!
Run via terminal
An alternative to the UI, when it comes to unpause and trigger and DAG, is straightforward. Knowing the ID of the DAG, then all we need is:
airflow dags unpause EXAMPLE_simple && airflow dags trigger EXAMPLE_simple
Checking the logs via terminal
Assuming your airflow installation is in the $HOME directory, it’s possible to check the logs by doing:
cd ~/airflow/logs/EXAMPLE_simple/task_2
And select the correct timestamp (in my case it was):
tail 2021-08-06T14:57:35.762094+00:00/1.log
Where the output should include:

Followed by the actual number we’ve generated in this run.
Conclusion
This is a beginner’s friendly DAG, using the new Taskflow API in Airflow 2.0. It’s possible to create a simple DAG without too much code. In the next post of the series, we’ll create parallel tasks using the @task_group decorator.